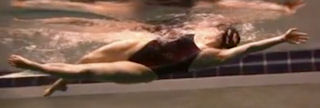
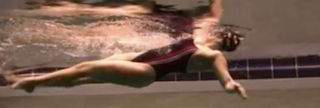
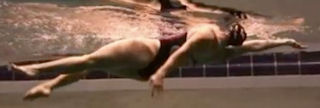
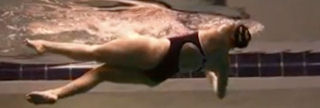
| 


| Backstroke Basics
Why learn backstroke? Most elements of backstroke are identical to freestyle.
These two strokes are called the long-axis strokes, because to perform
both strokes you rotate around an axis that runs down your centerline, from head
to toes. Learning backstroke allows you to focus on many elements of freestyle
without having to deal with the disruption of freestyle breathing and the difficulty
of the asymmetrical timing of the freestyle arm movements. It helps you to learn
correct body position because for both strokes you need to maintain your front-to-back
balance at the surface. For many people, backstroke is much easier than freestyle.
When you are able to swim both strokes, you should always swim a bit of backstroke
during your workout. Swimming backstroke (or any other stroke) for just a short
period of time allows you to return to freestyle with a refreshed awareness. Freestyle
and Backstroke Similarities - Posture: Belly in, neck tall, chin
back
- Rotation: Hips and core rotate around the long axis
- Kicking:
Six-beat kick (three kicks for each arm stroke)
- Catch: Anchor hand/forearm
early, using the elbow
- Pull: Pull body forward by pressing back
on the anchor
Freestyle and Backstroke Differences
| Aspect | Backstroke | Freestyle |
| Head Position | Absolutely still, straight
up | Straight down, but must rotate to breathe |
| Breathing | Natural | Disrupts
posture and balance | | Arm Timing | Symmetrical
(no glide) | Asymmetrical, front-quadrant
emphasis | | Arm Recovery | Straight | High
elbow | Backstroke Arms on the Deck Learn
the arm movements out of the water first. Begin in standing swimming posture:
belly in, neck tall, chin back. Maintain good posture - eyes forward and feet
planted - while rotating your core during this exercise. - Thumb
Out: Begin with arms at sides, thumbs forward. Without bending your elbow,
begin raising one arm overhead, leading with the thumb.
- Pinky In:
As your arm goes past horizontal, begin turning your arm so that your pinky finger
is leading at full extension overhead. In the water you will be thinking thumb
out, pinky in.
- Catch: Keeping your head still and feet planted,
twist your core to the side as the extended arm reaches its highest point. Continue
moving your elbow in the same arc it was moving in, and continue twisting your
core. While keeping your wrist straight, allow your hand and forearm to drop.
When your wrist and forearm are parallel to the floor, you have maximized the
surface of your arm that is perpendicular to your direction of travel. There
is no glide in backstroke - your elbow keeps moving until it is in this catch
position - and then the pull - or press, as we prefer to call it - begins.
- Press:
Press your hand/forearm towards the floor, applying pressure on your wrist and
the heel of your hand (not on your fingers).
- Snap: When you can
no longer press your forearm and hand as a unit, accelerate your hand towards
your leg to snap the finish. This provides minimal propulsion, but helps to get
your arm out of the water and back out front. Without a little zing at the end
of the stroke, your arm tends to stall and get "stuck" fully extended
back towards your feet.
Begin slowly. Learn this movement pattern
with one arm, then with the other. Then have somebody hold a kickboard under your
hand/forearm at the catch position to provide slight resistance. Then try this
motion alternating arms - in backstroke the arms never stop moving. At home, perform
this exercise in front of a mirror.
Learning Progression (Focus Points)Use
fins initially. Kick very gently focusing on keeping your feet at the surface.
For the One-Arm Backstroke and Backstroke sets, use the following focus points
for at least a couple lengths each: - Thumb out, pinkie in
- Full
extension with shoulder and arm close to head
- Elbow goes directly to the
catch
- Alternating dry shoulders
- Snappy finish
- One-Arm Backstroke:Begin in extended back balance position. The extended
arm is the one you will stroke with for the entire length. Start every length
with good posture and use swimming breathing (out through the nose, in through
the mouth). Use the focus points above.
- Backstroke: Now use both
arms, repeating focus points above.
- 4 Back 3 Free: After the fourth
stroke of backstroke, pivot and perform three freestyle strokes (no breathing).
Then after the third freestyle stroke pivot back onto your back to begin the next
4/3 cycle.
- Fingertip Drag: Use open turns at the far wall.
- 4
Back 3 Free: To get refocused on balance at the surface
- Underwater
Recovery Freestyle: Use open turns at the far wall.
See the Video
Clips - Backstroke page. |

